Building your first plug-in with Conformal
Welcome to Conformal! In this tutorial we’ll:
- Set up our development environment
- Build a simple tremolo effect plug-in using Conformal
If you need help or encounter any issues along the way, please use the “Questions?” link on the right sidebar to start a discussion on GitHub, we’d love to hear from you!
Note that this tutorial is written for macOS. However, with small tweaks, it should work on Windows as well! See the Quick Start guide for more details on getting started developing on Windows.
What are we building?
In this tutorial we’ll build a plug-in that applies an artificial tremolo effect to an audio signal. This effect is simple to implement (which is why it was chosen!), but it can be musically useful. Many classic guitar amplifiers can apply this effect, which confusingly was often labeled “vibrato”.
Installing prerequisites
The first step is to install bun , which is the toolkit we use to run TypeScript code. Conformal uses TypeScript for scripts for common tasks like building and testing, so you’ll be using bun a lot! However, you don’t need to become a bun expert to work with Conformal - feel free to treat it as a black-box.
To install bun, follow the instructions on their website .
Create a new project
Now that we have all the tools we need, let’s create a new Conformal project! To do this, we’ll use the bun create command, the syntax is bun create conformal <project_slug>. Here a “slug” is the internal name for the project, which must be in lower_snake case and in particular must not contain spaces. Note that a project can contain multiple plug-ins. You can use whatever slug you like; but in the commands in this tutorial we’ll use conformal_tutorial.
bun create conformal conformal_tutorialThis script will ask you a few questions to set up your project. The first question it will ask you is the “slug” for the plug-in, which again should be lower_snake case and not contain spaces. Since we’re making a tremolo plug-in, tremolo makes sense.
After that, it will ask about a human-readable “vendor” name. Most DAWs group plug-ins by vendor. You can choose anything you like here, but “Conformal Tutorial” works if you can’t think of anything
Finally, it will ask you for a human-readable plug-in name. Let’s call it “Tremolo”.
? Plug-in type (`effect` or `synth`) effect
? Plug-in slug (lower snake_case, e.g. `my_plugin`) tremolo
? Human-readable vendor name (DAWs often present plug-ins grouped by vendor).  e.g., "My Project"?
? Human-readable plug-in name (e.g. `My Plug-in`)? Tremolo
At this point, you’re the proud owner of a new Conformal project in the conformal_tutorial directory! 🎉. Let’s take a quick tour!
The project structure
rust- This include the signal processing code. In a new project, this will contain two crates:tremolo/component- This contains the core processing code.tremolo/vst- This wraps thetremolo/componentcrate in a format compatible with the VST3 SDK. You hopefully won’t have to change this crate much.
web- In a new project, this will contain a few configuration packages, but only one really important package:tremolo- This contains the user interface for thetremoloplug-in.
There’s some other files in the repo, which are there to configure various tools used for build-related tasks. If you aren’t familiar with them, don’t worry - Conformal aims to provide a good starting point. If you are familiar with them, though, you should feel free to customize them!
Development environment
From here on out, run all shell commands from the project folder (cd conformal_tutorial should get you there!)
First, we must install all the project’s TypeScript dependencies with
bun installWe can use the project’s bootstrap script to finish installing the required development tools 🥾. Note that this script may prompt you to take some manual steps to install additional software - please just enjoy the journey.
bootstrap is a one-time set-up - you won’t need to run it again, even if you
set-up a new project!
bun run bootstrapBuilding the project
At this point, it’s a good idea to make sure the project builds correctly and we can load the plug-in in a DAW. To build the plug-in and package it for use in a DAW, we use the package script:
bun run packageNow, the plug-in should be accessible from your VST3-compatible DAW! For example, it should show up like this in Ableton:

Right now, the plug-in will be a simple volume control, with a pretty awkward UI. But, it’s a plug-in, and you built it! Congratulations! 🎊 Feel free to take some time to celebrate 🥳.
For the rest of the tutorial, we’ll modify this template project to create a tremolo effect.
Tremolo processing
To implement the audio processing part of the plug-in, we’ll have to modify the rust code that defines the processing. This will be in rust/tremolo/component/src/lib.rs. Open the file and take a look around!
The most relevant parts of this file are:
- The
PARAMETERSarray, which defines the user-controllable parameters. Right now this includes “Bypass”, which is required for VST3 effects, and “Gain”, which controls the volume. We’ll need to change these to the parameters we want for the tremolo effect. - The
Effectstruct and trait implementation, which defines the actual processing. Note that right now, theEffectstruct has no data, which means that the processing is stateless - it doesn’t remember anything between calls - something as simple as a volume control doesn’t have to!
To create our tremolo effect, we’ll first create an LFO , which will output a slow signal that will bounce up and down between 0.0 (fully off) and 1.0 (fully on). Then, we’ll multiply the input signal by this LFO signal to create the tremolo effect. The signal flow will look like this:
Writing the LFO
Let’s dig in and start writing the LFO! We’ll implement this in a new file in the tremolo/component/src directory, called lfo.rs. This file will define the Lfo struct that we’ll later use to implement the tremolo effect.
#[derive(Default, Clone, Debug)]
pub struct Lfo {
    /// State will vary from 0.0 (at the beginning of a cycle
    /// to 1.0 (at the end of a cycle)
    state: f32,
}

impl Lfo {
    /// Here `increment` is the rate the LFO expressed in cycles per sample.
    /// E.g., if this is 0.1, the LFO will complete a cycle every 10 samples.
    ///
    /// We return the current value of the Lfo.
    pub fn run(&mut self, increment: f32) -> f32 {
        // When we are less than half-way through the cycle,
        // the output value goes up as we move through the cycle,
        // when we are more than half-way through, the output value
        // goes down as we move through the cycle.
        //
        // This ends up creating a triangle wave: `/\/\/\/\/\/`
        let value = if self.state < 0.5 {
            self.state * 2.0
        } else {
            2.0 - self.state * 2.0
        };

        // Increment the state by the increment value, wrapping to keep the state
        // between 0.0 and 1.0.
        self.state = (self.state + increment) % 1.0;

        value
    }
}
To add this to the project, we’ll need to add the following line somewhere in lib.rs. Note that it doesn’t matter where in the file you put it, but many people put it right after the use statements.
mod lfo;Now we have an LFO! 🤘
Optional: Testing the LFO
Well, we think we have the LFO, but how do we know it actually works? We can add some unit tests to the lfo.rs file to ensure basic properties are upheld!
If you’re in a rush, you can skip this section to get on with building the rest of the plug-in.
Place this code at the bottom of the lfo.rs file:
#[cfg(test)]
mod tests {
    use super::*;

    #[test]
    fn starts_at_zero() {
        let mut lfo = Lfo::default();
        assert_eq!(lfo.run(0.1), 0.0);
    }

    #[test]
    fn completes_in_ten_samples() {
        let mut lfo = Lfo::default();
        for _ in 0..10 {
            lfo.run(0.1);
        }
        assert_eq!(lfo.run(0.1), 0.0);
    }
}
We can run all rust tests with the following command:
bun run rust-testUnfortunately, if we run this, we’ll get the following error:
---- lfo::tests::completes_in_ten_samples stdout ----
thread 'lfo::tests::completes_in_ten_samples' panicked at rust/tremolo/component/src/lfo.rs:50:9:
assertion `left == right` failed
  left: 2.3841858e-7
 right: 0.0
Darn, what happened? The answer is that rounding errors accumulated over the 10 sample cycle, so that the LFO didn’t return to exactly zero but rather the very small number of 2e-7. This illustrates a basic principle for testing audio processing:
When testing audio processing code, never compare floating-point numbers exactly. Instead, allow some small amount of difference between the expected and actual values to allow for rounding errors.
Luckily, the Rust ecosystem has our backs - there’s a crate called assert_approx_eq that provides a macro to compare floating-point numbers approximately. We can add this to our Cargo.toml file:
[dev-dependencies]
assert_approx_eq = "1.1.0"
Note that we put dependencies like that are only used for testing, in the [dev-dependencies] section.
Exercise: Replace the assert_eq! macro with the assert_approx_eq! macro
and get the tests to pass. Hint: You’ll need to import the macro in the tests module
by adding use assert_approx_eq::assert_approx_eq; right after mod tests {.
Using the LFO
Now, we’re in a position to use the LFO in the tremolo effect! Make the following edits to lib.rs to hook it up:
#[derive(Clone, Debug, Default)]
pub struct Effect {
    lfo: lfo::Lfo,
}

impl Processor for Effect {
    fn set_processing(&mut self, processing: bool) {
        if processing {
            // Reset the LFO when processing is enabled. This makes sure that
            // the LFO always starts at the beginning of a cycle when processing begins.
            self.lfo = lfo::Lfo::default();
        }
    }
}

// TODO: This number is pulled out of a hat! We should calculate this better.
const LFO_INCREMENT: f32 = 1.0 / 10000.0;

impl EffectTrait for Effect {
    fn handle_parameters(&mut self, _context: &impl HandleParametersContext) {}
    fn process(
        &mut self,
        context: &impl ProcessContext,
        input: &impl Buffer,
        output: &mut impl BufferMut,
    ) {
        let parameters = context.parameters();
        // Copy our stored LFO into the `lfo` variable.
        // If we run the LFO on multiple channels, we want to always start
        // in the same state.
        let lfo = self.lfo.clone();

        for (input_channel, output_channel) in channels(input).zip(channels_mut(output)) {
            // Copy the `lfo` variable into a new variable for each channel.
            let mut channel_lfo = lfo.clone();
            for ((input_sample, output_sample), (gain, bypass)) in input_channel
                .iter()
                .zip(output_channel.iter_mut())
                .zip(pzip!(parameters[numeric "gain", switch "bypass"]))
            {
                *output_sample = *input_sample
                    * (if bypass {
                        1.0
                    } else {
                        channel_lfo.run(LFO_INCREMENT) * gain / 100.0
                    });
            }
            // Update the stored LFO with the state of the channel LFO.
            self.lfo = channel_lfo;
        }
    }
}
Most of the subtle points are called out in comments but here are a few things to keep in mind:
- When writing a processor with state, it’s important that the state gets reset when processing is enabled. This ensures processing is deterministic so that every time a user runs the plug-in, they get the same result. This should be done in the
set_processingfunction. - Effects sometimes run in multiple channels (e.g., stereo). Sometimes this means we have to do some thinking about how the multiple channels interact with internal state of processing. In this case, we copied the stored state into a new variable for each channel, and then copied the state back into the stored state at the end of the channel loop. This is a simple way to make sure that the state progresses the same way in each channel, but of course there are many ways to accomplish this.
At this point, you can use bun run package again to test out the tremolo effect in this nascent state 🐣.
Sampling rates
One flaw with the effect as it stands now is that we’re using a fixed increment for the LFO, which means that the LFO will complete a cycle every 10,000 samples. However, what we hear is how often the LFO completes a cycle in seconds. The conversion rate between samples and seconds is controlled by the DAW, and in most DAWs the user can set it to whatever they want! So, as a plug-in, we need to work with whatever sampling rate we are provided with. We can accomplish this by adding a sampling_rate field to the Effect struct, and updating the LFO increment based on the sampling rate.
#[derive(Clone, Debug, Default)]
pub struct Effect {
    sampling_rate: f32,
    lfo: lfo::Lfo,
}

impl Processor for Effect {
    fn set_processing(&mut self, processing: bool) {
        if processing {
            self.lfo = lfo::Lfo::default();
        }
    }
}

const LFO_RATE: f32 = 5.0;

impl EffectTrait for Effect {
    fn handle_parameters(&mut self, _context: &impl HandleParametersContext) {}
    fn process(
        &mut self,
        context: &impl ProcessContext,
        input: &impl Buffer,
        output: &mut impl BufferMut,
    ) {
        let parameters = context.parameters();
        let lfo = self.lfo.clone();

        for (input_channel, output_channel) in channels(input).zip(channels_mut(output)) {
            let mut channel_lfo = lfo.clone();
            for ((input_sample, output_sample), (gain, bypass)) in input_channel
                .iter()
                .zip(output_channel.iter_mut())
                .zip(pzip!(parameters[numeric "gain", switch "bypass"]))
            {
                *output_sample = *input_sample
                    * (if bypass {
                        1.0
                    } else {
                        channel_lfo.run(LFO_RATE / self.sampling_rate) * gain / 100.0
                    });
            }
            self.lfo = channel_lfo;
        }
    }
}

impl ComponentTrait for Component {
    type Processor = Effect;

    fn parameter_infos(&self) -> Vec<parameters::Info> {
        parameters::to_infos(&PARAMETERS)
    }

    fn create_processor(&self, env: &ProcessingEnvironment) -> Self::Processor {
        Effect {
            sampling_rate: env.sampling_rate,
            lfo: lfo::Lfo::default(),
        }
    }
}
It’s worth taking a breath to think through the units here, since sample rate calculations can often be tricky 🤔: LFO_RATE is in units of , while sampling_rate is in units of , and the run function takes an argument increment in units of . Thinking this through, LFO_RATE / self.sampling_rate gives us , the correct units for increment.
If you repackage plug-in again with bun run package, you should find that the tremolo effect now sounds the same at any sampling rate! 🕰️
Controlling the tremolo rate
While we have a tremolo effect, right now there is no way for the user to control the rate! Let’s add one. To do this, we’ll adjust the PARAMETERS array to replace the gain parameter with a rate parameter.
const PARAMETERS: [InfoRef<'static, &'static str>; 2] = [
    InfoRef {
        title: "Bypass",
        short_title: "Bypass",
        unique_id: "bypass",
        flags: Flags { automatable: true },
        type_specific: TypeSpecificInfoRef::Switch { default: false },
    },
    InfoRef {
        title: "Rate",
        short_title: "Rate",
        unique_id: "rate",
        flags: Flags { automatable: true },
        type_specific: TypeSpecificInfoRef::Numeric {
            default: 5.,
            valid_range: 0.01f32..=10.,
            units: Some("Hz"),
        },
    },
];
Most of the fields on InfoRef should be pretty intuitive! If something is confusing or you want to learn more, you can deep-dive on any field in the Rust API documentation.
Now, we need to: update the process function to stop using the gain parameter and use this new rate parameter instead!
    fn process(
        &mut self,
        context: &impl ProcessContext,
        input: &impl Buffer,
        output: &mut impl BufferMut,
    ) {
        let parameters = context.parameters();
        let lfo = self.lfo.clone();

        for (input_channel, output_channel) in channels(input).zip(channels_mut(output)) {
            let mut channel_lfo = lfo.clone();
            for ((input_sample, output_sample), (rate, bypass)) in input_channel
                .iter()
                .zip(output_channel.iter_mut())
                .zip(pzip!(parameters[numeric "rate", switch "bypass"]))
            {
                *output_sample = *input_sample
                    * (if bypass {
                        1.0
                    } else {
                        channel_lfo.run(rate / self.sampling_rate)
                    });
            }
            self.lfo = channel_lfo;
        }
    }
Finally, we can delete the LFO_RATE constant, which is no longer needed.
If you repackage the plug-in with bun run package, you should find that the tremolo effect now indeed has a rate control in the DAW automation lane! Nice! This concludes the Rust part of the tutorial, we’ve accomplished our goal of building a tremolo effect!
However, you may have noticed that we’ve broken the user interface, which still is expecting the gain parameter to be present. Let’s fix that now!
Building the user interface
Let’s dive right in to writing the user interface! In this tutorial we’ll move pretty fast in the spirit of having fun and getting results quickly 🚀. We’ll try to focus on what’s unique to Conformal and not get too bogged down in deep explanations of concepts.
If you are feeling lost or want to learn the concepts properly, it might be worth spending some time doing a tutorial or reading documentation specifically on React development in TypeScript, which should cover the basics of building web UIs in TypeScript in much more depth than this tutorial does.
Development workflow
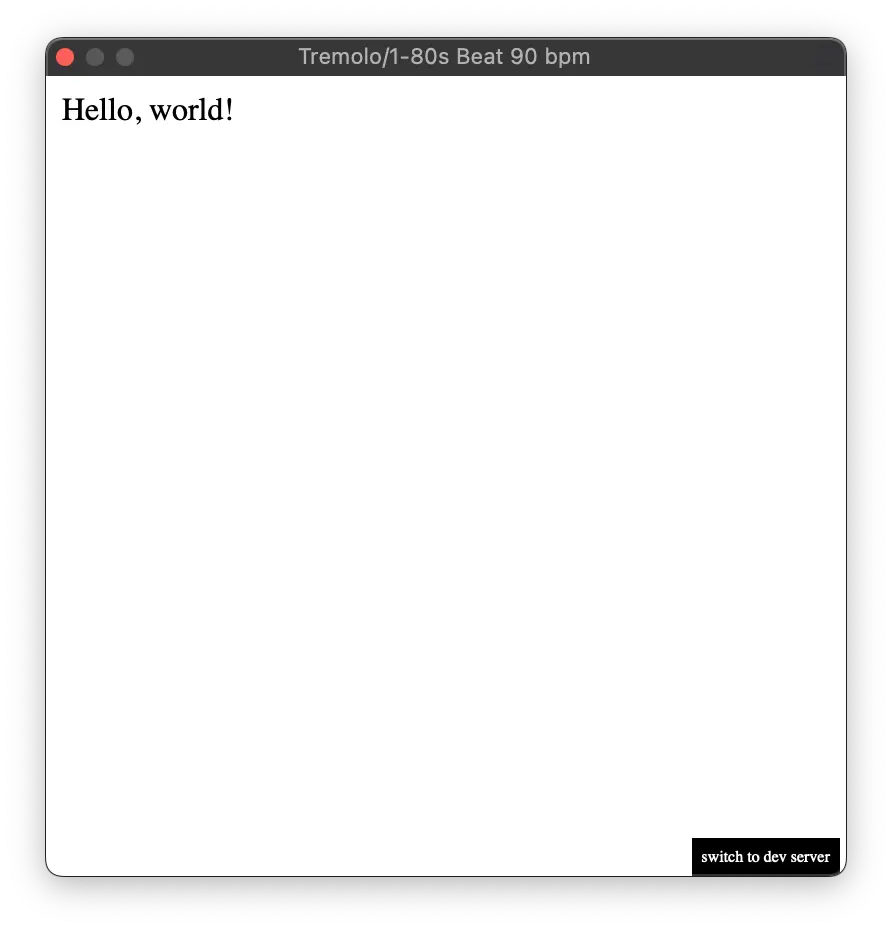
After we removed the gain parameter, our UI will be blank due to an error. Let’s fix this by deleting the entire contents of web/tremolo/src/Layout.tsx and replacing it with this stub:
const Layout = () => <div>Hello, world!</div>;

export default Layout;
Running bun run package and re-launching our DAW should show something like this:
We can now start building the UI by making changes to Layout.tsx and then remembering to call bun run package and re-launching our DAW to see the changes. However, there’s a much faster way to work on UIs, the Dev Server! To start the dev server, run:
bun run web-devThen, click the “switch to dev server” button in the bottom-right of the plug-in window.
Note that users won’t be able to see this button, it’s only enabled in “dev
mode”. “Dev mode” is automatically turned on for the plug-in when the bun run package script is called.
Now, while the plug-in is open in the DAW, make an edit to Layout.tsx and save the file, for example, change the “Hello, world!” text to something else! You should see the changes reflected immediately in the plugin window! Pretty cool, huh? 🪄
You can click the “switch to embedded” button to go back to the view that’s embedded into the plug-in. This will be way the view was the last time you ran bun run package.
Building interactivity
Music software UIs tend to have unique and captivating designs. Unlike software that is purely functional, music software aims to spark creativity in its users. This opens up a wide range of possibilities for fun and whimsical design choices. If you’re interested in exploring the history of music interface design, we recommend checking out the books published by bjooks .
Despite the creative freedom available, in this tutorial, we’re going to be super boring 🥱 and use interface elements that are built-in to the web platform. In your own projects, you should feel free to build your own interface elmements or use any React-based library you find on npm. Our best friend is going to be the range-type input, documented here . To hook up a range control to our rate parameter, we can edit the Layout.tsx like this:
import { useNumericParam } from "@conformal/plugin";

const Layout = () => {
  const {
    value,
    info: {
      valid_range: [min, max],
    },
    set,
  } = useNumericParam("rate");
  return (
    <div>
      <label>
        Rate: <span style={{ float: "right" }}>{value.toFixed(2)}hz</span>
      </label>
      <div>
        <input
          type="range"
          min={min}
          max={max}
          value={value}
          step="any"
          onChange={(e) => set(parseFloat(e.currentTarget.value))}
          style={{ width: "100%" }}
        />
      </div>
    </div>
  );
};

export default Layout;
Here useNumericParam, provided by Conformal, acts as a bridge between the plug-in’s state and the React component. This is called a React hook, and is meant to be called inside a React Component. The hook returns an object containing the parameter’s current value, relevant info like the min and max value of the parameter, and a set function you can call to set the current state.
The rest of the implementation simply hooks up the data returned by useNumericParam to an input range element, and updates the value when the user moves the slider.
After this, we should be able to move the slider in the UI to control the rate of the tremolo effect! Functionally, the tremolo effect is now complete!
Adding color
Okay, we did say we were going to be boring, but perhaps we’ve taken things a little too far with the boringness. It’s getting a bit sleepy in here 💤! Let’s add a little flair, first by changing the colors and fonts in the UI. In the template project, the style is defined by index.css.
As projects get more complicated, you may want to have a more robust styling system than a single CSS file. Your plug-in UI in Conformal is just a React app, so it’s compatible with any styling system that works with React, such as tailwindcss , or CSS Modules . For now, let’s just dump everything in index.css. This specific CSS might look a bit weird, since it’s using unusual directives to style input elements. There’s some documentation here
body {
  user-select: none;
  -webkit-user-select: none;
  background: #170f11;
  color: #af2bbf;
  font-family: "Gill Sans";
  font-size: 36px;
}

input[type="range"] {
  appearance: none;
  -webkit-appearance: none;
  background: transparent;
}
input[type="range"]::-webkit-slider-runnable-track {
  width: 100%;
  height: 36px;
  background: #af2bbf;
  border-radius: 18px;
  border: none;
}
input[type="range"]::-webkit-slider-thumb {
  -webkit-appearance: none;
  border: none;
  height: 36px;
  width: 36px;
  border-radius: 100px;
  background-color: #adf1d2;
}
On macOS, Conformal will run the web UI in a WKWebView, which is similar to
Safari. If you are reading documentation for a web platform feature that
depends on the browser, usually using the Safari version will work.
Exercise: Use coolors.co or some other online palette generator to find a new color palette you like, and update the colors in the CSS file to match!
Adding a visualization
Okay, this is looking pretty cool! As a last step, let’s add a visualization animation so users can see the speed of the LFO with their eyes. Our goals for this section are just to end up with a more compelling plug-in, as well as learn how to make a UI that spans multiple source files, using separate React Component with props.
First, let’s just add a placeholder to our layout. We can create a new file, Animation.tsx:
const Animation = () => <div>Animation Goes Here</div>;

export default Animation;
And then import and use this in Layout.tsx:
import { useNumericParam } from "@conformal/plugin";
import Animation from "./Animation";

const Layout = () => {
  const {
    value,
    info: {
      valid_range: [min, max],
    },
    set,
  } = useNumericParam("rate");
  return (
    <div>
      <label>
        Rate: <span style={{ float: "right" }}>{value.toFixed(2)}hz</span>
      </label>
      <div>
        <input
          type="range"
          min={min}
          max={max}
          value={value}
          step="any"
          onChange={(e) => set(parseFloat(e.currentTarget.value))}
          style={{ width: "100%" }}
        />
      </div>
      <Animation />
    </div>
  );
};

export default Layout;
We can switch back to the DAW window to make sure the placeholder appears. Now, let’s implement the Animation!
We’ll use SVG to draw a zig-zag to represent the LFO, and a CSS animation to make it move. If you’re not familiar with these techniques, don’t sweat the details here, the purpose of this part of the tutorial is to get familiar with building a UI out of multiple components that spans multiple files. If you are curious, there’s lots of resources on the web for learning more! The definitive reference is the Mozilla Developer Network Web Docs , but these days it might be easier to ask an LLM for help as a starting point.
import { useId } from "react";

const ZigZag = () => {
  const lines = Array.from({ length: 20 }, (_, i) => {
    const x1 = i * 10;
    return (
      <g key={i}>
        <line x1={x1} y1={0} x2={x1 + 5} y2={100} stroke="#AF2BBF" />
        <line x1={x1 + 5} y1={100} x2={x1 + 10} y2={0} stroke="#AF2BBF" />
      </g>
    );
  });

  return (
    <svg
      preserveAspectRatio="none"
      viewBox="0 0 200 100"
      style={{
        height: "200px",
        width: "100%",
      }}
    >
      {lines}
    </svg>
  );
};

const Animation = ({ rate }: { rate: number }) => {
  const id = useId();
  const animationId = `visualization-${CSS.escape(id)}`;
  return (
    <div style={{ overflow: "hidden", marginTop: "50px" }}>
      <style>
        {`@keyframes ${animationId} {
          to {
            transform: translateX(-100%);
          }
        }`}
      </style>
      <div style={{ animation: `${animationId} ${1 / rate}s linear infinite` }}>
        <div style={{ position: "relative", width: "200%" }}>
          <ZigZag />
        </div>
      </div>
    </div>
  );
};

export default Animation;
This change adds a prop to the Animation component - rate. Inside the component, we use this prop to control the speed of the animation. props must be set when you use a component - so we need to adjust our Layout component to pass this prop. Lets edit the usage of Animation in Layout.tsx to do this:
<Animation rate={value / 10} />Here you can tune the speed by eye, but dividing the actual LFO rate by 10 is a good starting point.
The UI should now be looking something like this:
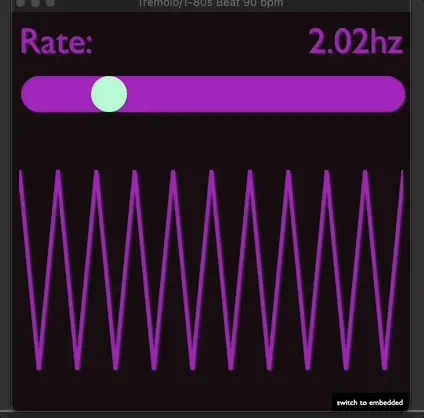
And the speed of the animation is controlled by the current rate of the plug-in! Not too shabby! 🎨
Conclusion and exercises
Wow! Congratulations on completing this tutorial! You’ve made a fully-featured plug-in using Conformal, including writing Rust signal processing code and a TypeScript React UI that connects to it! Impressive! 👏. If you’re inspired, feel free to share your success in the show and tell section of the GitHub! ☺️
While we didn’t have a lot of time to dwell on detailed concepts, hopefully this has given you a sense of the flavor of building plug-ins in Conformal. If you ran into trouble or think this tutorial could be improved, don’t hesitate to provide feedback on GitHub using the “Questions? Give us feedback” link on the right side of the page. We’d love to hear from you!
If this tutorial was too easy and you want a greater challenge, why not try some of these exercises? The real tutorial begins now! 🏋️
Exercise: Add a “depth” control to the tremolo effect. This control should control how much the volume varies between the peaks and troughs of the LFO. The depth should be a percentage of the volume, so that a depth of 100% would mean the volume varies between 0% and 100% of the input volume, where a depth of 50% would mean the volume varies between 50% and 100% of the input volume.
Exercise: Add multiple LFO shapes to the tremolo effect in addition to just a triangle wave. You can use the “enum” type parameter to allow the user to select between different LFO shapes. Make whatever awesome shapes you want, but if you’re looking for inspiration, you could try a sine wave, a square wave, or a sawtooth wave. Bonus points if you update the animation to match the selected LFO shape!
Exercise: Right now, the effect does the same thing to both channels of a stereo signal. Try doing something different depending on the channel! For example, you could lower the volume in the first channel while raising the volume in the second channel, rather than affecting them both the same way. Effects like these are often called “auto-panners”. Warning: make sure the effect still does something if a single channel is provided! In some DAWs, users can choose to run the effect in mono or stereo, and we want both to work! Bonus points if you update the animation to represent what’s happening!